Setting up a blog theme is one of the most exciting parts AND probably the most complicated parts of starting your blogging journey. It’s your chance to create a unique online presence that reflects your personality and brand, but this is also where it gets quite “techy”.
This guide will walk you through selecting a theme, installing essential plugins, and creating crucial pages for your blog so you don’t get overwhelmed… but if you do, there is always the comment section at the bottom of the page OR you can also email me and I can set everything up with you step-by-step.
Alright, let’s tackle how to set up your blog theme!
Step 1: Login To Your WordPress
There are two ways you can do this – from Google or from BlueHost. It’s the same thing, your choice.
How to log into WordPress from your browser?
Type www.yourblog.com/wp-admin into your browser URL (substituting “yourblog” with your actual blog name) then enter your username and password.
How to log into WordPress from your host?
Log into your www.bluehost.com/my-account/login, under Hosting, click “Edit Website”.
Step 2: Selecting Your Blog Theme
How to select the perfect blog theme?
- Consider Your Niche: Look for themes tailored to your specific niche (e.g., food, travel, fashion). A well-suited theme enhances user experience and complements your content.
- Responsive Design: Ensure the theme is mobile-friendly. A responsive design adapts to different screen sizes, providing a seamless experience for all users.
- Customization Options: Choose a theme that offers customization options. This allows you to tweak colors, fonts, and layouts to match your brand identity.
- Read Reviews: Check reviews and ratings for themes to gauge user satisfaction. Look for themes that have good support and regular updates.
- Free vs. Premium: Free themes can be a great starting point, but premium themes often offer more features and support. Weigh the pros and cons based on your budget and needs.
Step 3: Installing Your Theme
How to download a blog theme?
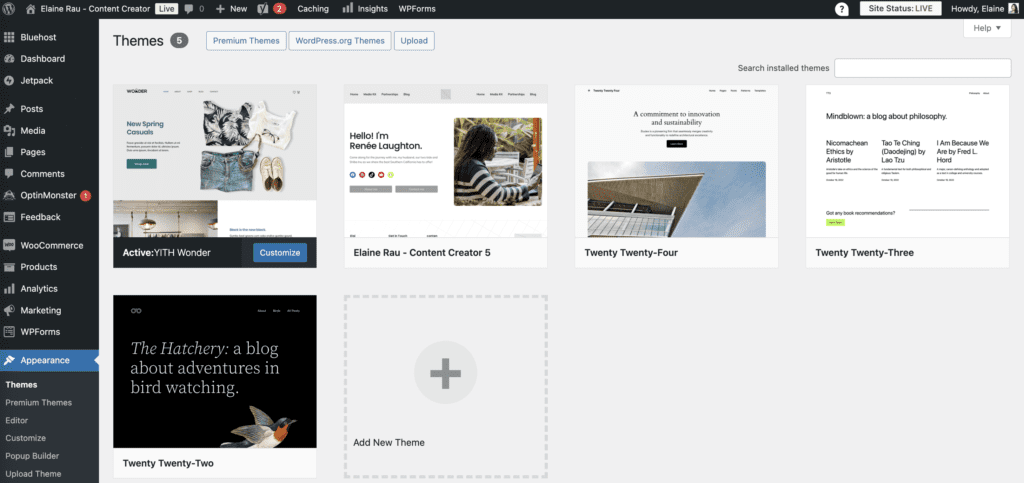
On your left side menu bar, click Appearance > Themes > Add New Theme.
When you find one that you like, click Install > Activate > Customize (it’s the same button).

Step 4: Essential Plugins for Functionality
If your theme doesn’t come with a social media bar on the top, you can download a plugin to help your blog have that functionality.
What is a plugin?
A plugin is a piece of software that adds specific features or functions to an existing software application, enhancing its capabilities.
Here are some must-have plugins for any blog:
- SEO Plugins: Install an SEO plugin like Yoast SEO or All in One SEO Pack to optimize your content for search engines.
- Caching Plugins: Speed up your site with caching plugins like W3 Total Cache or WP Super Cache. A fast-loading site improves user experience and SEO.
- Security Plugins: Protect your blog from threats with security plugins like Wordfence or Sucuri.
- Backup Plugins: Ensure your content is safe with backup plugins like UpdraftPlus, allowing you to restore your blog easily.
- Social Sharing Plugins: Encourage readers to share your content with plugins like Social Snap or Sassy Social Share.
How to download a plugin?
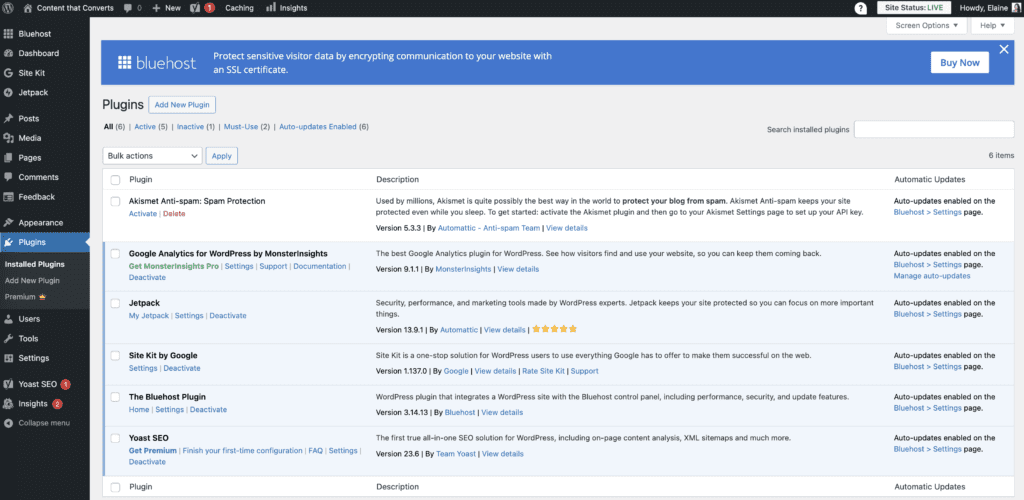
Go to Plugins on your left-hand menu bar and type in what you’re searching for in the search bar.
For example, “social media icon display”.

Read the description to learn what the plugin does and click Install > Activate.
How to edit a plugin?
Now that it’s activated, your plugin will show up somewhere on your left-side menu bar.
But you can also access it under Plugins > Installed Plugins.
Click on Settings to edit your plugin.

Step 5: Creating Essential Pages
Your blog needs several key pages to provide valuable information to your readers.
Here’s a list of essential pages to consider:
- Home Page: The main landing page that showcases your latest posts, featured content, and a brief introduction to your blog.
- About Page: Share your story, mission, and what readers can expect from your blog. This helps build a connection with your audience.
- Contact Page: Provide a way for readers and potential collaborators to reach you. Include a contact form and links to your social media.
- Blog Page: This page will host all your blog posts. Ensure it’s easy to navigate and visually appealing.
- Privacy Policy: Include a privacy policy page to inform users about data collection and privacy practices, especially if you collect user information.
- Disclaimer: If you promote affiliate products or sponsored content, a disclaimer page is important to maintain transparency with your audience.
How to edit your blog pages?
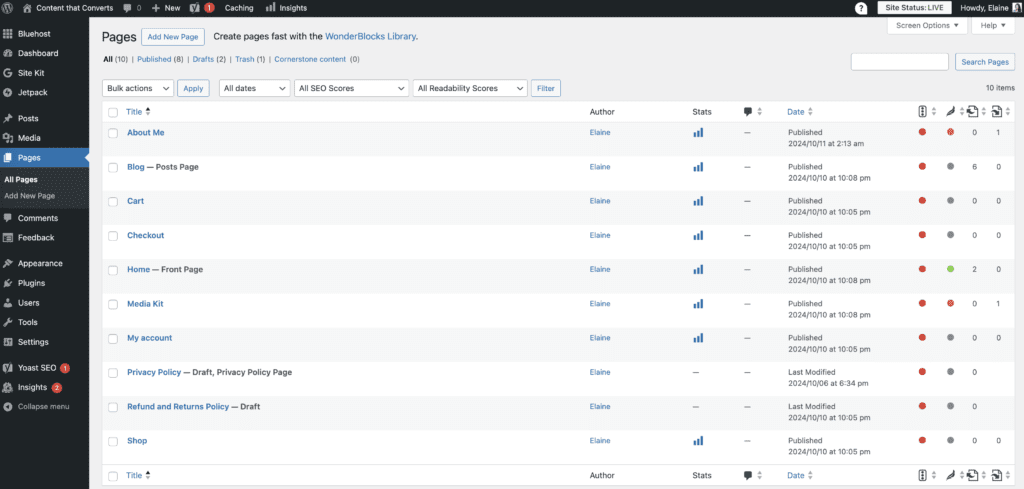
Locate Pages in your left-side menu, hover over the title of the page you’d like and click Edit.

Step 6: Customize Your Theme
After installing your theme and essential plugins, it’s time to customize your blog:
- Site Identity: Set your blog title, tagline, and logo in the theme customizer.
- Menu Setup: Create a navigation menu that links to your essential pages and categories, making it easy for readers to find what they need.
- Widgets: Utilize widgets to add features like recent posts, categories, or social media links in your sidebar or footer.
- Typography and Colors: Adjust fonts and colors to align with your brand. Consistency in design enhances your blog’s professionalism.
Conclusion
Setting up your blog theme involves careful selection and customization to create a unique online space that resonates with your audience. By choosing the right theme, installing essential plugins, and creating crucial pages, you can build a blog that not only looks great but also functions seamlessly. Start your blogging journey today and watch your ideas come to life!